Building a Flutter app is easy. However, maintaining it as your project grows can quickly become challenging. As a result, many developers struggle with messy and unstructured code.
If your application is becoming hard to manage, difficult to scale, or confusing to debug, then it’s time to adopt a better approach. Clean Architecture helps you solve these problems effectively.
Flutter is a powerful framework, but as your app grows, managing code becomes difficult. That’s where Clean Architecture helps — it keeps your project organized, scalable, and easy to maintain.
In this guide, you’ll learn Flutter Clean Architecture step by step with a simple example project.
🚀 What is Clean Architecture?
Clean Architecture is a way of structuring your app so that:
- Code is easy to understand
- Features are independent
- Changes don’t break everything
- Testing becomes simple
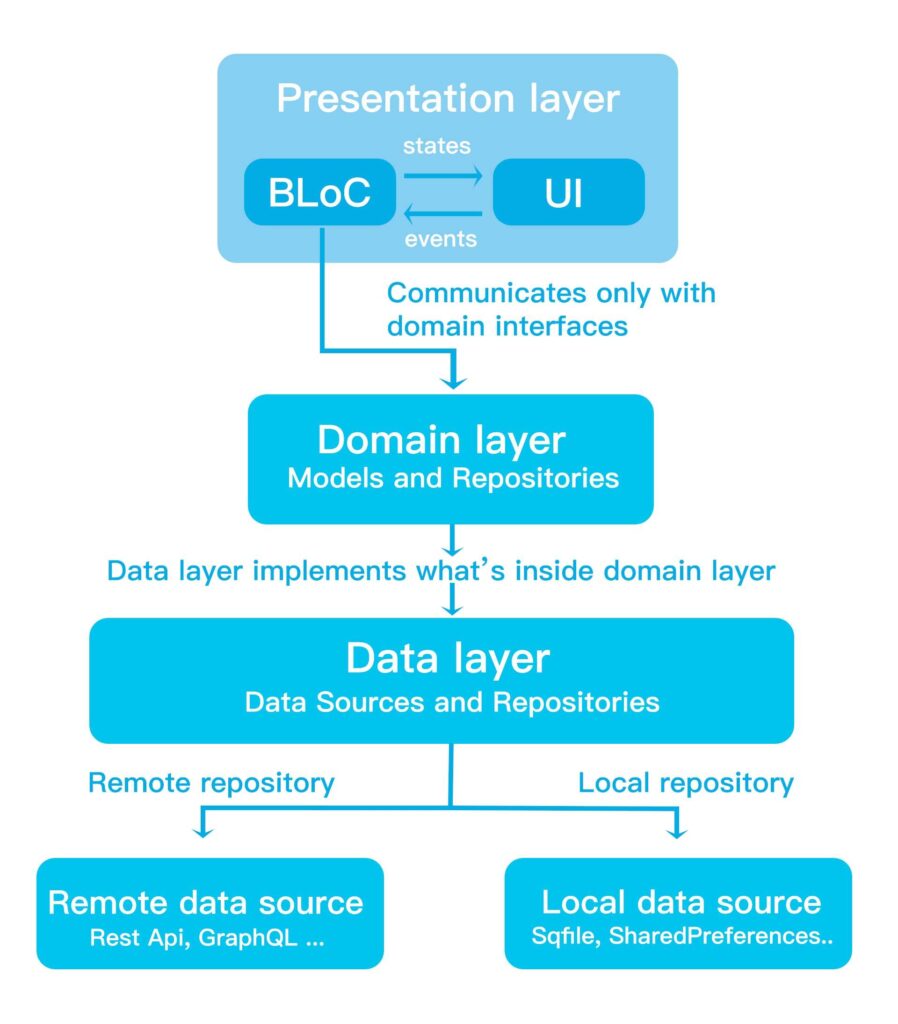
👉 It separates your app into layers, each with a specific responsibility.
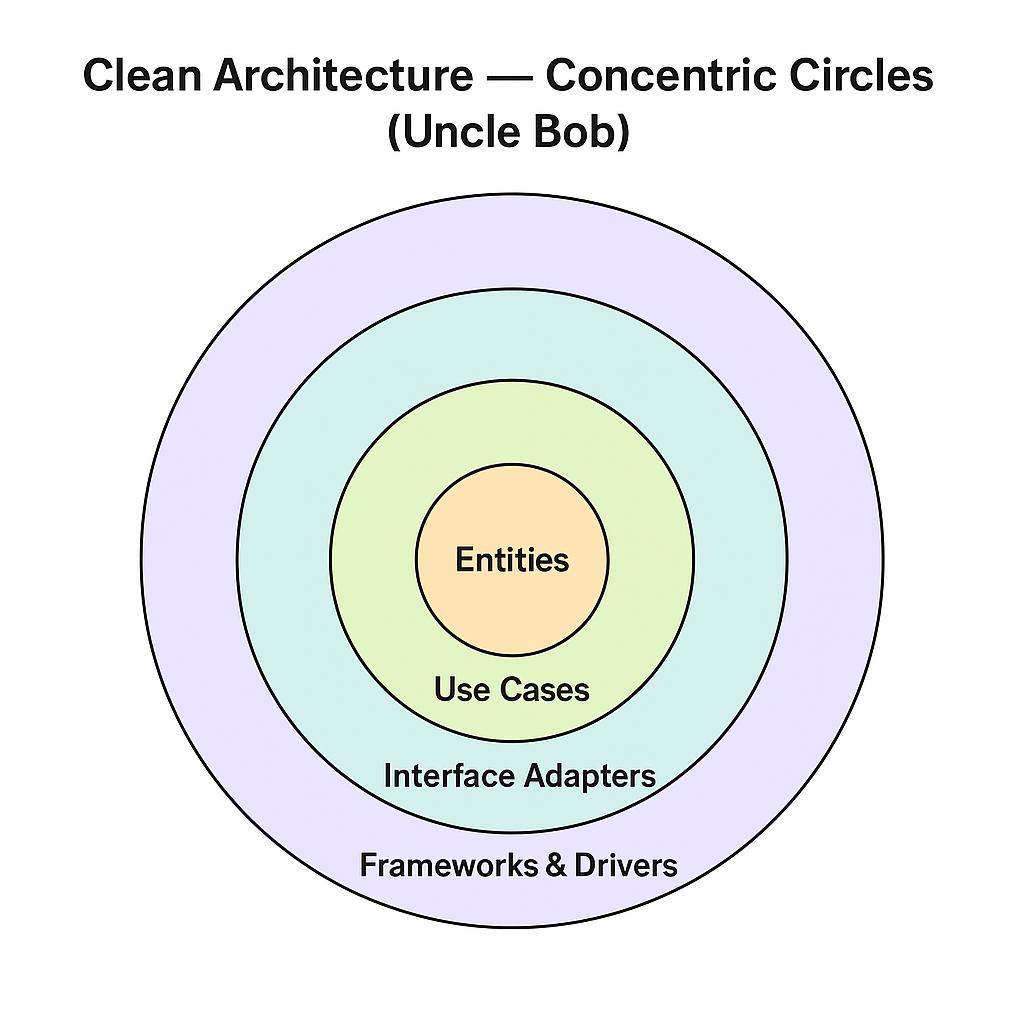
🧱 Layers in Flutter Clean Architecture
There are mainly 3 layers:
1. Presentation Layer
First of all, the presentation layer is responsible for the UI. It includes widgets, screens, and state management tools like Provider or Bloc.
Most importantly, this layer should not contain business logic. Instead, it should only handle user interactions and display data.
2. Domain Layer (Core Logic)
Next, the domain layer acts as the core of your application. It contains entities, use cases, and repository interfaces.
In particular, this layer defines what your app should do. Therefore, it remains independent of Flutter and external libraries.
- Business rules
- Use cases
- Entities (pure Dart classes)
3. Data Layer
Finally, the data layer manages data sources such as APIs and local databases. It also includes models and repository implementations.
As a result, this layer knows how to fetch and store data, but it does not control how the data is used.
- API calls
- Database (SQLite, Firebase)
- Models & Repositories

📂 Project Structure
Here’s a clean folder structure:
lib/
│
├── core/
│   ├── error/
│   ├── network/
│
├── features/
│   └── posts/
│       ├── data/
│       │   ├── models/
│       │   ├── repositories/
│       │   └── datasources/
│       │
│       ├── domain/
│       │   ├── entities/
│       │   ├── repositories/
│       │   └── usecases/
│       │
│       └── presentation/
│           ├── pages/
│           ├── widgets/
│           └── provider/
🛠️ Step-by-Step Example Project
Let’s create a simple app:
👉 Fetch and display posts from an API
✅ Step 1: Create Entity (Domain Layer)
To begin with, we define a simple Post entity. This class represents the core data structure of our application.
Entity = Pure business object
class Post {
  final int id;
  final String title;
  final String body;

  Post({
    required this.id,
    required this.title,
    required this.body,
  });
}
✅ Step 2: Create Repository Interface
After that, we define a repository interface. This interface specifies what actions can be performed, such as fetching posts.
abstract class PostRepository {
  Future<List<Post>> getPosts();
}
✅ Step 3: Create Use Case
Next, we create a use case. The use case connects the UI with the business logic.
For instance, when the UI requests data, the use case decides how to handle that request.
Use case = what your app does
class GetPosts {
  final PostRepository repository;

  GetPosts(this.repository);

  Future<List<Post>> call() async {
    return await repository.getPosts();
  }
}
✅ Step 4: Create Model (Data Layer)
Then, we implement a model class. This model is responsible for converting JSON data into Dart objects.
Model = JSON mapping
class PostModel extends Post {
  PostModel({
    required int id,
    required String title,
    required String body,
  }) : super(id: id, title: title, body: body);

  factory PostModel.fromJson(Map<String, dynamic> json) {
    return PostModel(
      id: json['id'],
      title: json['title'],
      body: json['body'],
    );
  }
}
✅ Step 5: Create API Service
Now, we create a remote data source. This service handles API calls and returns data to the repository.
import 'dart:convert';
import 'package:http/http.dart' as http;

class PostRemoteDataSource {
  Future<List<PostModel>> getPosts() async {
    final response = await http.get(
      Uri.parse('https://jsonplaceholder.typicode.com/posts'),
    );

    final List data = json.decode(response.body);

    return data.map((e) => PostModel.fromJson(e)).toList();
  }
}
✅ Step 6: Repository Implementation
After that, we implement the repository. This step connects the domain layer with the data layer.
class PostRepositoryImpl implements PostRepository {
  final PostRemoteDataSource remoteDataSource;

  PostRepositoryImpl(this.remoteDataSource);

  @override
  Future<List<Post>> getPosts() async {
    return await remoteDataSource.getPosts();
  }
}
✅ Step 7: Presentation Layer (Provider Example)
Meanwhile, we use Provider to manage the application state. It helps update the UI whenever new data is available.
import 'package:flutter/material.dart';

class PostProvider extends ChangeNotifier {
  final GetPosts getPosts;

  PostProvider(this.getPosts);

  List<Post> posts = [];
  bool isLoading = false;

  Future<void> fetchPosts() async {
    isLoading = true;
    notifyListeners();

    posts = await getPosts();

    isLoading = false;
    notifyListeners();
  }
}
✅ Step 8: UI Screen
Finally, we build the UI. The screen displays data and reacts to user interactions.
class PostPage extends StatelessWidget {
  @override
  Widget build(BuildContext context) {
    final provider = Provider.of<PostProvider>(context);

    return Scaffold(
      appBar: AppBar(title: Text("Posts")),
      body: provider.isLoading
          ? Center(child: CircularProgressIndicator())
          : ListView.builder(
              itemCount: provider.posts.length,
              itemBuilder: (context, index) {
                final post = provider.posts[index];
                return ListTile(
                  title: Text(post.title),
                  subtitle: Text(post.body),
                );
              },
            ),
      floatingActionButton: FloatingActionButton(
        onPressed: () => provider.fetchPosts(),
        child: Icon(Icons.download),
      ),
    );
  }
}
🎯 Benefits of Clean Architecture
- ✅ Easy to scale large apps
- ✅ Better code readability
- ✅ Independent layers (low coupling)
- ✅ Easy testing & debugging
- ✅ Reusable components
⚠️ Common Mistakes to Avoid
- ❌ Mixing UI with business logic
- ❌ Skipping domain layer
- ❌ Direct API calls in UI
- ❌ Not using repository pattern
🧠 Pro Tips
- Use Riverpod or Bloc for advanced state management
- Add error handling (try-catch)
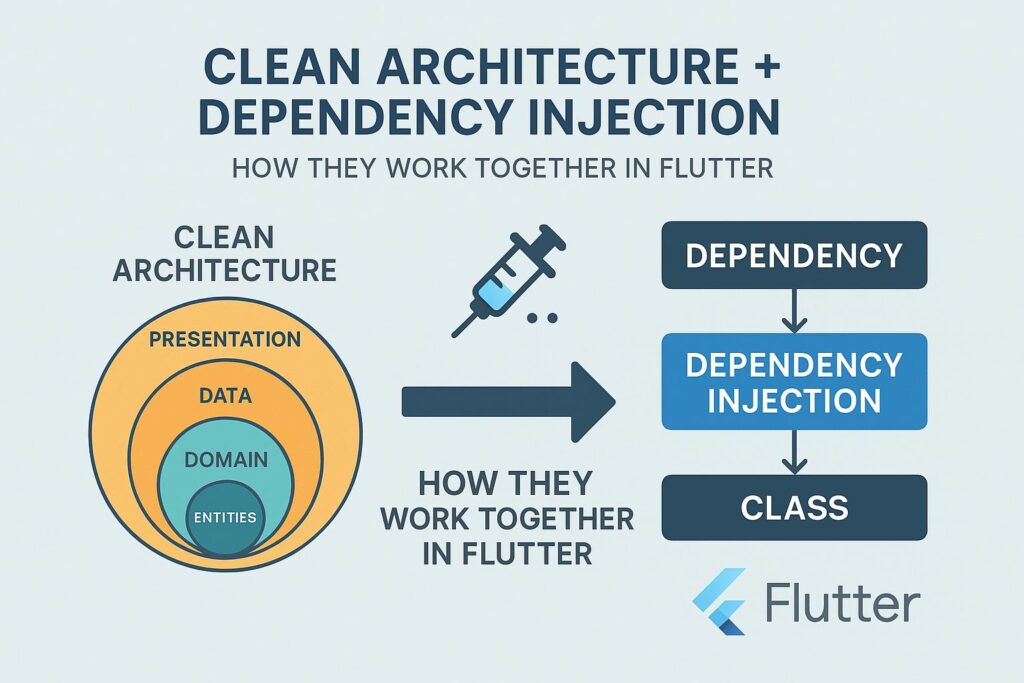
- Use dependency injection (GetIt)
- Keep domain layer pure (no Flutter imports)
🏁 Conclusion
Clean may feel complex at first, but once you understand the flow:
👉 UI → UseCase → Repository → Data Source
…it becomes very powerful and clean.
Start small, practice with simple apps, and gradually apply it to bigger projects.
❤️ Stay Connected & Keep Learning!
Enjoyed this article? Share it with your fellow developers and let’s continue the conversation! Follow us for more Flutter insights 🚀
❤️❤️ Thanks for reading this article ❤️❤️
If I got something wrong? Let me know in the comments. I would love to improve 🥰🥰🥰
Clap 👏👏👏 If this article helps you,
if you like our work, please follow us on this Futureappcode.
Related Articles:
Boost Android App Performance: Pro Tips for 2026
WordPress Trends in 2026: Block Themes, AI Tools & Voice Search